For me, efficiency is one of a desktop’s most crucial features. I require an operating system that enables me to operate effortlessly and painlessly with numerous windows open. The desktop version of MacOS is an excellent choice for users of all kinds. It’s really sturdy, stylish, and easy to use.
But there is one very noticeable problem I’ve always had with the MacOS UI, and that is the lame effort at window snapping it provides. Not only is window snapping restricted right out of the box, but it’s also difficult to use. I thus set out to discover a method that would provide genuine window snapping for MacOS in addition to making it easy.
What is window snapping?
You may use window snapping to move a window to any edge of your screen—the top, bottom, right, or left—and it will automatically reposition itself to occupy only that portion of the screen. For instance:
A window will automatically occupy the right half of the display when it is dragged to the right edge.
A window will automatically occupy the left half of the display when it is dragged to the left edge.
A window will automatically fill the entire display when it is dragged to the upper edge.
Snapping actions may be customized in the majority of effective window managers. Sadly, MacOS by default only lets you snap right or left (using a laborious window button operation).
Fortunately, you can add more conventional window snapping to MacOS using very useful software. Rectangle is the name of that software. The application is compatible with Apple Silicon and Intel devices.
One thing to note is that you will not receive the full-screen resizing that should appear when you drag a window to the top edge if you use Stage Manager in addition to Rectangle for window snapping.
Rather, the window will expand to fill the whole display, save for the area needed to accommodate the Stage Manager symbols. Full-sized windows on the display are blocked by Stage Manager, although window snapping is still available.
Installing Rectangle
What you’ll need: An iMac or MacBook Pro/Air, or any other MacOS computer, will suffice for this.
Step 1: Get the installer downloaded.
Launch the web browser of your choice and navigate to the Rectangle GitHub page. Proceed here to download the app.
Step 2: Install the Rectangle.

Upon completion of the download, double-click the file to launch the installation window. Drag the Rectangle icon into the Applications folder while the installer window is active.
Read More: Best Guide to Set Apple Watch to Vibrate Only!
Configuring Rectangle
Step 1: Let’s get started.
Launchpad should be open. Type Rectangle. To launch the Rectangle program, click the launcher. To enable the application to execute when requested, click Open.
Step 2: Open System preferences

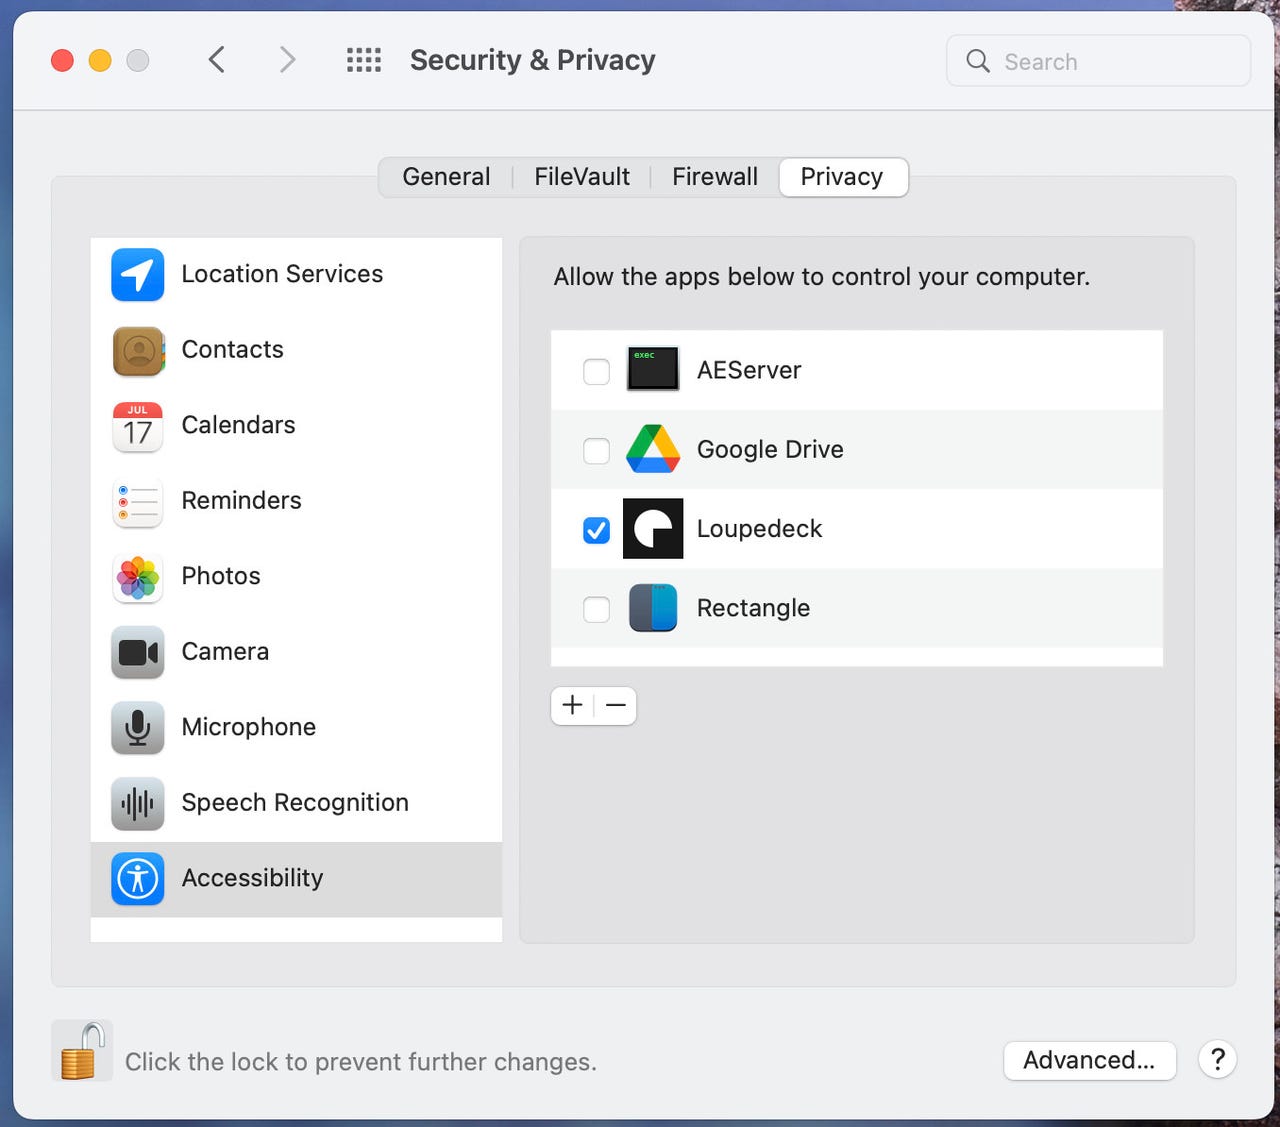
Rectangle needs the necessary permissions, which you must provide for it to work correctly. You’ll be prompted to choose Open System Preferences when the program launches.
Step 3: Give Rectangle permission

Click the lock symbol in the bottom left corner of the System Preferences program to access it, then enter your user password. After unlocking Security & Privacy, select the Rectangle checkbox, click Recommended in the ensuing pop-up window, and close the System Preferences window (at this time, you may also exit the Rectangle installer).
Step 4: Set Up the Rectangle
The Rectangle configuration box will open when you provide the app with the necessary rights. Here, you may customize each shortcut to your preference.

Read More: How do I fix Windows 10 slow boot?
Using Rectangle
Once the program has been configured, exit the Settings window. This will allow you to snap open windows into position by dragging them to the corners or edges. Compared to needing to memorize complicated keyboard shortcuts or the odd title bar button, this is a lot easier.
To date, Rectangle has shown to be the most straightforward way I’ve discovered to snap windows in MacOS. Bravo to the developer who made the application. And don’t forget to think about giving the developer of Rectangle a contribution if you like using it.

